In the realm of Japanese cuisine, few dishes hold the charm and simplicity of Okaka Onigiri. These delectable rice balls, filled with fragrant bonito flakes and seasoned with a touch of soy sauce, have captured the hearts and taste buds of people worldwide.
In this article, we’ll delve into the art of crafting the perfect Okaka Onigiri, exploring its origins, discussing the ingredients, providing a step-by-step recipe guide, and answering some frequently asked questions.
So, let’s embark on this culinary journey and learn how to create a tantalizing Okaka Onigiri.
1. Okaka Onigiri: A Brief History
Okaka Onigiri has its roots deeply embedded in Japanese culinary traditions. Onigiri, or rice balls, have been enjoyed in Japan for centuries, often as a convenient and portable snack. The term “Okaka” refers to bonito flakes that are gently toasted and seasoned with soy sauce. The combination of fluffy rice and umami-packed bonito flakes creates a harmonious flavour profile that has become a staple in Japanese cuisine.

2. Essential Ingredients for Okaka Onigiri
To prepare Okaka Onigiri, you’ll need the following ingredients:
- Japanese short-grain rice: 2 cups
- Water: 2 ½ cups
- Bonito flakes (Okaka): 1 cup
- Soy sauce: 2 tablespoons
- Salt: 1 teaspoon
Note: You can find Japanese short-grain rice, bonito flakes, and soy sauce in Asian grocery stores or online on Amazon.
3. Step-by-Step Okaka Onigiri Recipe
Step 1: Washing the Rice
Before cooking the rice, it’s important to wash it thoroughly to remove any excess starch. Place the rice in a large bowl and fill it with water. Gently stir the rice with your hand, and as the water becomes cloudy, drain it carefully. Repeat this process two to three times until the water runs clear.
Step 2: Cooking the Rice
Transfer the washed rice to a rice cooker or a saucepan. Add water according to the rice cooker’s instructions or use a 1:1.25 ratio of rice to water in a saucepan. Let the rice soak in the water for about 30 minutes before cooking. Once the soaking time is complete, cook the rice according to the appliance’s instructions or bring it to a boil in the saucepan, then reduce the heat and let it simmer for about 15-20 minutes until the rice is cooked and tender.
Step 3: Preparing the Okaka Filling
While the rice is cooking, let’s prepare the Okaka filling. In a dry skillet over low heat, add the bonito flakes and gently toast them for about 2-3 minutes until they become aromatic. Be careful not to burn them. Once toasted, transfer the bonito flakes to a bowl and add the soy sauce. Mix well until the flakes are evenly coated with soy sauce.
Step 4: Shaping the Onigiri
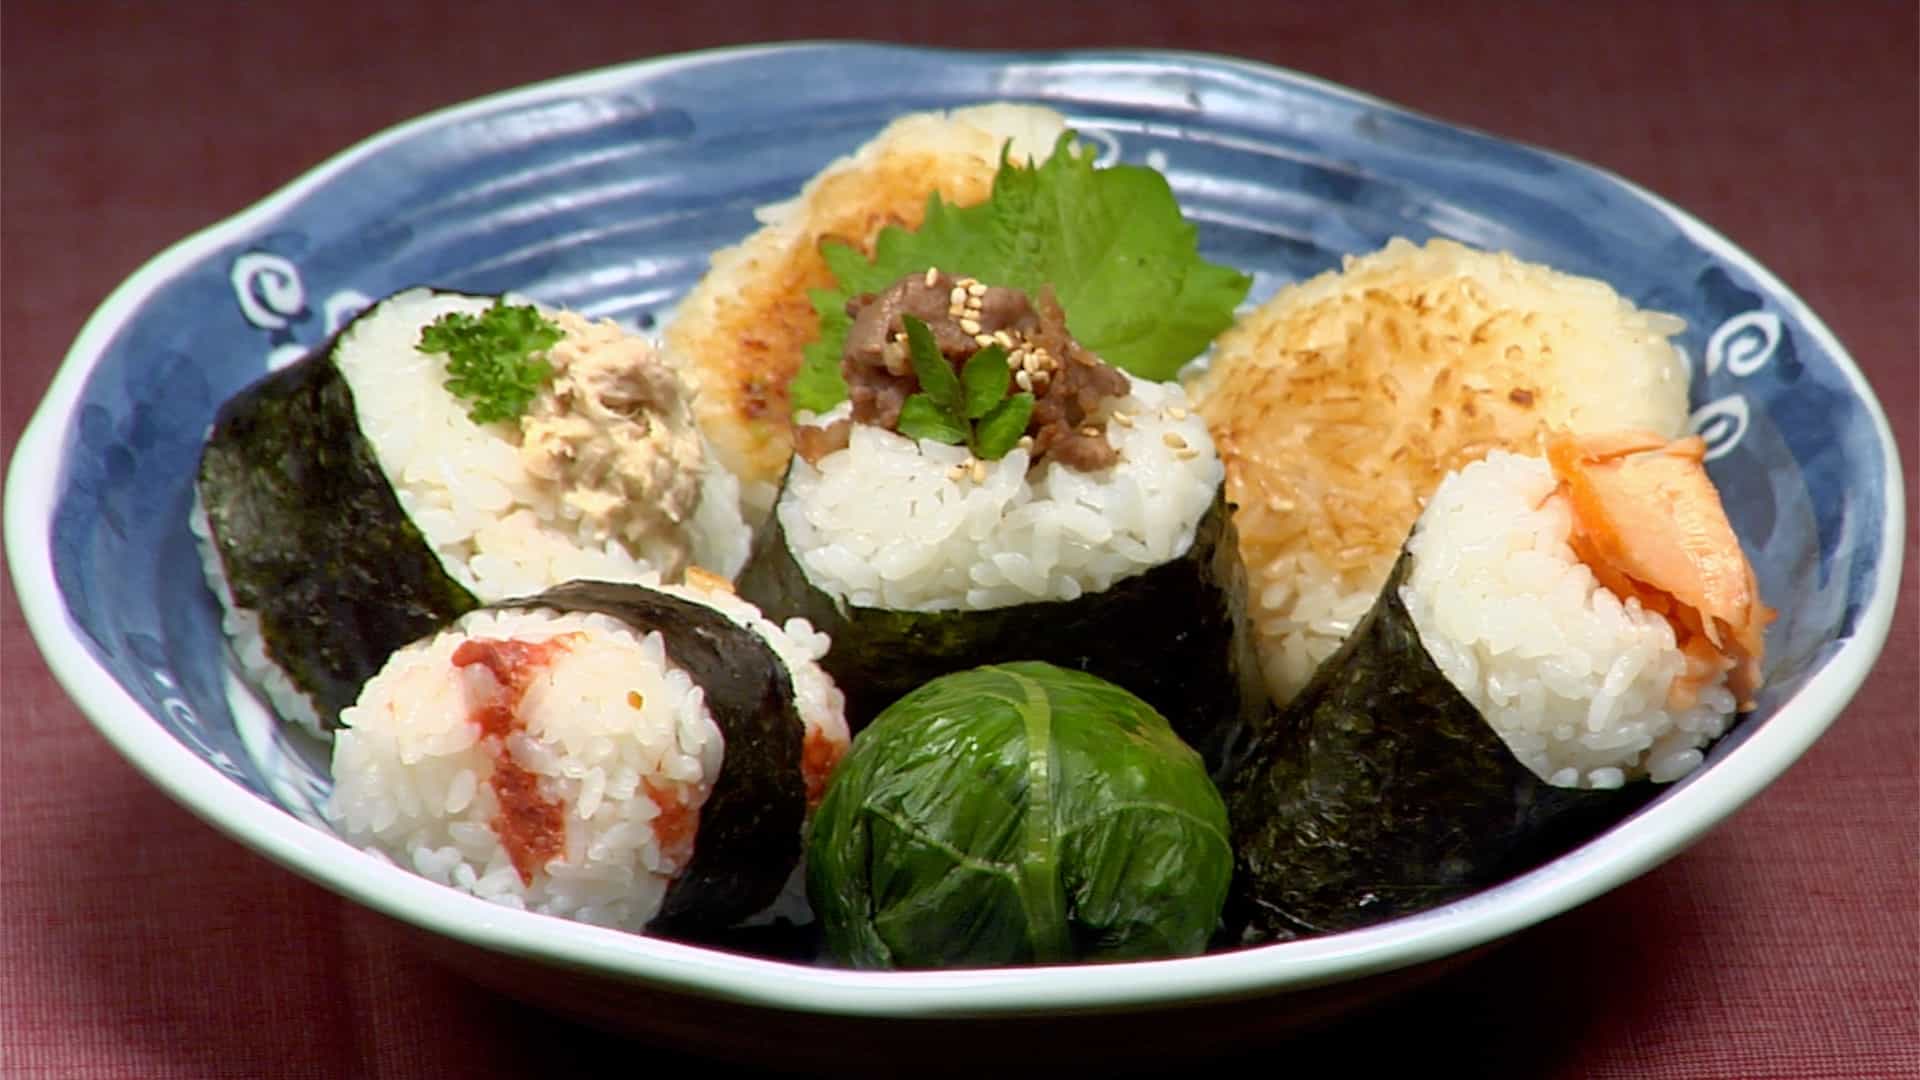
Once the rice is cooked, let it cool slightly until it’s comfortable to handle. Wet your hands with water to prevent the rice from sticking. Take a handful of rice and gently press it to form a flat oval shape in the palm of your hand. Make a small indentation in the centre and fill it with a teaspoon of the Okaka mixture. Close the rice over the filling, shaping it into a triangle or a ball. Repeat this process with the remaining rice and filling.
Step 5: Seasoning the Onigiri
To enhance the flavour, sprinkle a pinch of salt on the surface of each Onigiri. This step is optional but recommended for an extra savoury taste.
Step 6: Serving and Enjoying
Your Okaka Onigiri is now ready to be savoured. You can enjoy it immediately or wrap it with a strip of nori (seaweed) for added flavour and presentation. Okaka Onigiri is perfect for a quick snack, a delightful addition to lunch boxes, or a satisfying picnic treat.
4. FAQs About Okaka Onigiri
Certainly! While Okaka is the traditional filling for Onigiri, you can get creative and experiment with various fillings. Popular options include pickled plums (umeboshi), grilled salmon, or even seasoned vegetables. Let your taste buds guide you and explore the endless possibilities.
Okaka Onigiri is best enjoyed fresh or within the same day. If you plan to store them, wrap each rice ball tightly in plastic wrap to maintain its freshness. Stored properly in the refrigerator, they can last for up to 24 hours, but note that the texture and flavour may slightly change over time.
Yes, you can freeze Okaka Onigiri for longer storage. Individually wrap each rice ball in plastic wrap, place them in a freezer-safe container, and store them in the freezer for up to one month. To thaw, transfer the frozen Onigiri to the refrigerator overnight, then reheat them in a microwave or gently pan-fry them until heated through.
Absolutely! Sushi rice, known for its sticky texture, is an excellent alternative for making Okaka Onigiri. Follow the same cooking and shaping process mentioned earlier, and enjoy the delightful combination of sushi rice and bonito flakes.
Yes, Okaka Onigiri offers room for creativity and personalization. You can add additional ingredients such as sesame seeds, shredded nori, or even mix finely chopped herbs like shiso leaves or green onions to the rice before shaping it. These additions will impart unique flavours and textures to your Onigiri.
The traditional Okaka Onigiri recipe itself is gluten-free, as it consists of rice, bonito flakes, and soy sauce. However, it’s essential to ensure the soy sauce you use is gluten-free, as some varieties may contain wheat. Look for gluten-free soy sauce options to make a completely gluten-free Okaka Onigiri.
Conclusion
Okaka Onigiri is a delightful Japanese treat that combines simplicity, taste, and portability in one delicious package. With its origins deeply rooted in Japanese cuisine, this rice ball filled with seasoned bonito flakes has become a beloved dish worldwide.
By following the step-by-step recipe provided, you can create your own Okaka Onigiri and experience the authentic flavours of Japan. So, gather your ingredients, embrace your culinary creativity, and enjoy the delightful journey of making Okaka Onigiri.


